When it comes to running a WordPress website with Contact Form 7, one common issue site owners face is handling fake or invalid email addresses submitted through the forms. These faulty submissions can clog up your email inbox, waste your time, and disrupt the workflow.
Fortunately, there is one simple solution to combat this issue, which is to add email verification to Contact Form 7 submissions. In this guide, we’ll walk you through how to add email verification for Contact Form 7 in just two easy steps.
We’ll also discuss why email verification is crucial, introduce the Contact Form 7 Email Verification plugin, and provide step-by-step instructions for installation and configuration. By the end, you’ll have a more secure and reliable contact form on your website.
Let’s get started!
Why Should You Add Email Verification for Contact Form 7?
Spam submissions and fake email addresses are common problems that website owners face when using contact forms. Email verification can help solve these issues by ensuring that only valid, working email addresses make it through your form.
Here are several reasons why you should consider adding email verification to Contact Form 7:
- Prevent Spam and Fake Submissions: Email verification filters out submissions from bots or users who input fake email addresses. This helps maintain the integrity of your form submissions and reduces the number of irrelevant or malicious entries.
- Improve Email Deliverability: Verifying email addresses guarantees that the contact information you collect is accurate. When you respond to submissions, your emails are more likely to reach valid inboxes, improving communication with your audience.
- Boost Conversion Rates: When your forms are filled with valid email addresses, you’re more likely to turn those inquiries into real conversions. Whether it’s a lead, a sale, or a request for information, legitimate email addresses give you a better chance of engaging with actual customers.
- Save Time on Manual Cleanup: Without email verification, you might spend significant time manually filtering out invalid or fake submissions. Verifying emails during form submission helps automate this process, saving you time and energy.
- Enhance User Experience: Verifying emails also helps users by prompting them to correct any mistakes in their email addresses before completing the form. This reduces frustration and ensures smoother communication.
- Reduce Bounce Rates: Invalid email addresses often result in email bounces, which can harm your domain’s reputation. Email verification lowers the chances of this happening by ensuring that emails are valid and active.
- Ensure Accurate Data Collection: If you’re using your contact forms to collect leads or build an email list, email verification ensures that you’re gathering high-quality, actionable data.
To implement email verification in Contact Form 7, we’ll use the Contact Form 7 Email Verification plugin. This tool simplifies the process and ensures that your forms remain spam-free while collecting only valid email addresses.
Contact Form 7 Email Verification Plugin
The Contact Form 7 Email Verification Plugin is designed to seamlessly integrate with your existing Contact Form 7 setup. It helps you avoid fake submissions by sending verification emails to users, requiring them to confirm their email addresses before the form data is processed.
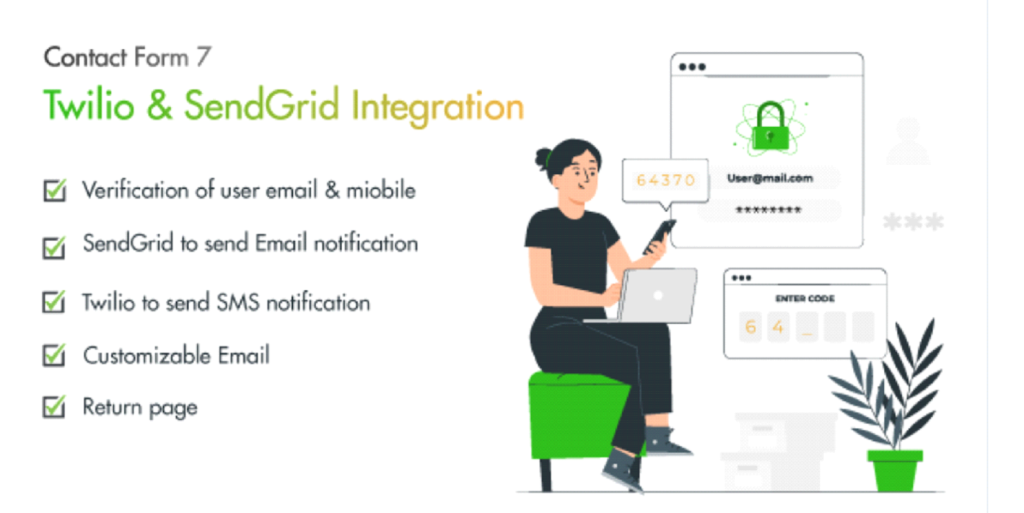
This plugin is particularly useful for anyone who relies on form submissions for important tasks like generating leads, handling customer inquiries, or collecting user data for marketing purposes. With a simple verification step, you can ensure that the information coming through your forms is reliable and accurate.
Key Features of the Contact Form 7 Email Verification Plugin:
- Seamless Integration with Contact Form 7: This plugin works flawlessly with your existing forms, meaning you can add email verification without the need for major adjustments to your current setup.
- Email Verification Process: When users submit a form, they will receive an email with a verification link. Only after confirming their email will the form submission be accepted.
- Real-time Email Validation: This feature ensures that only valid email addresses are allowed through the form. Users are prompted to verify their email before completing the submission, reducing the chances of receiving spam or incorrect email addresses.
- Customizable Email Content: You can modify the email subject line and body to fit your branding. Customize messages to give users clear instructions on how to verify their email addresses.
- Multiple Email Methods Supported: Whether you use WordPress’s default mail system or an external service like SendGrid, the plugin offers flexible email-sending options to ensure the reliable delivery of verification emails.
- Twilio SMS Integration: For an extra layer of security, the plugin supports SMS verification. If enabled, users will need to verify their email address and receive an SMS code to complete the submission.
- Customizable Verification Popup: To enhance the user experience, you can set up a verification popup that provides users with a smooth and interactive process. This includes options for customizing the popup’s color scheme to match your website’s branding.
Using the Contact Form 7 Email Verification Plugin gives you more control over the quality of your form submissions. You can drastically reduce spam and improve deliverability and data accuracy.
2 Easy Steps to Add Email Verification for Contact Form 7
Now that you understand the importance of adding email verification, it’s time to set it up. We’ll walk you through the simple two-step process to install and configure the Contact Form 7 Email Verification Plugin on your WordPress website.
Step #1: Install and Activate the Contact Form 7 Email Verification Plugin
To install and activate the Contact Form 7 Email Verification plugin, follow these steps.
- First, get the Contact Form 7 Email Verification plugin from CodeCanyon.
- Next, log in to your WordPress dashboard.
- Navigate to the Plugins menu on the left-hand side and click on Add New Plugin.
- Now, click on Upload Pugin and select the .zip file you received in your mailbox.
- Click Install Now and then Activate it by entering the Licence Key.
Once the plugin is activated, you’ll see a new set of options for configuring email verification in Contact Form 7.
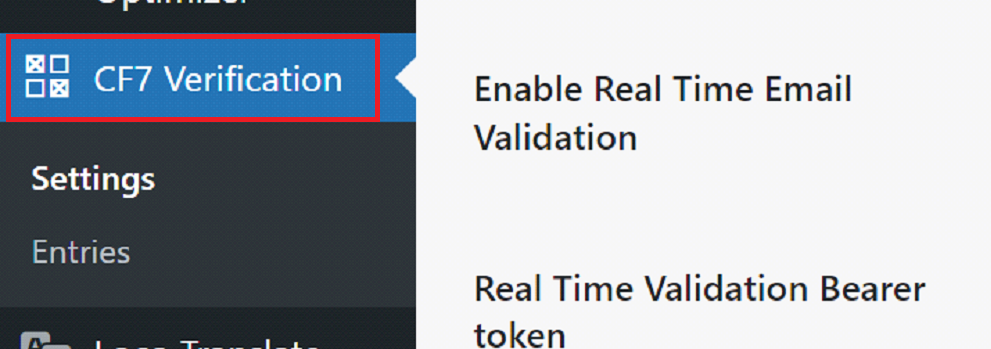
Step #2: Configure the Email Verification Settings
The next step is to configure the plugin settings to suit your needs. These settings are divided into three main sections: General Settings, SMS Settings, and Mail Settings. Each section contains options that you can adjust to control how email verification works on your website.
#1: General Settings
In the General Settings section, you’ll find the core options for configuring email verification.
- Enable Email Verification: Make sure this option is checked to activate the email verification feature.
- Send Copy to Customer: If enabled, this option will send a copy of the submission to the user once their email is verified.
- Customer Email Subject: Here, you can customize the subject line of the verification email that users will receive.
- Verification Popup Settings: Adjust the color scheme of the email verification popup to match your website’s design. Options include Primary Color, Secondary Color, and Button Color.
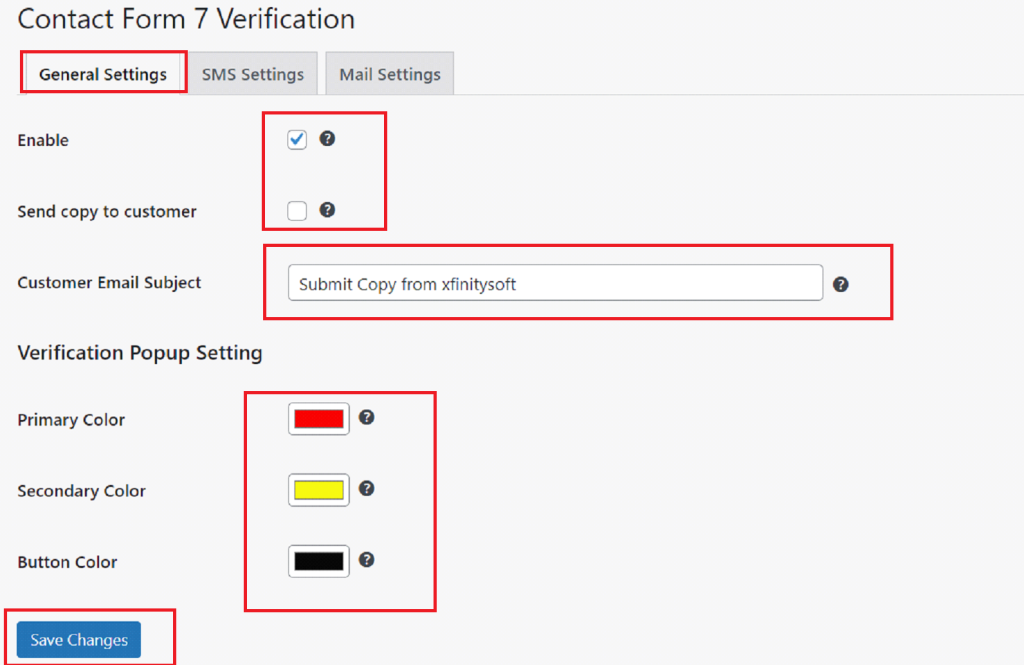
After configuring these settings, click Save Changes to ensure that your adjustments take effect.
#2: SMS Settings
If you want to add an extra layer of security, you can configure SMS verification. This is useful for businesses that want to ensure even more accurate and secure form submissions.
- Enable SMS Verification: Check this box to enable SMS-based verification in addition to email verification.
- Twilio API Integration: To send SMS codes, you’ll need a Twilio account. Enter your Twilio API credentials to connect your WordPress site with Twilio’s SMS service.
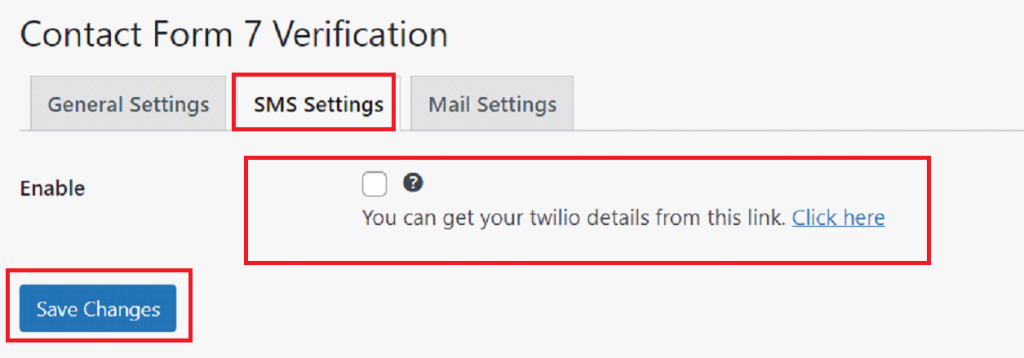
Once you’ve configured the SMS settings, click Save Changes to activate the feature.
#3: Mail Settings
In the Mail Settings section, you’ll configure how the verification emails are sent and handled.
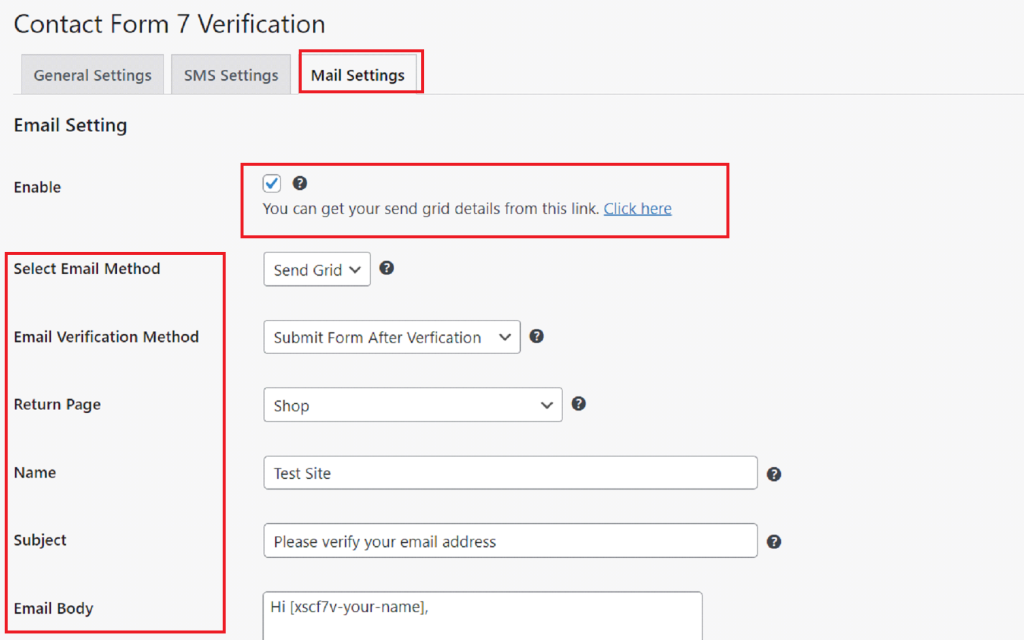
- Enable Email Verification: Ensure this option is enabled for email verification to work.
- Select Email Method: You can choose between the default WordPress mail system or an external service like SendGrid for more reliable email delivery.
- Email Verification Method: Choose whether to verify the email address before or after the form submission.
- Return Page: Select the page to which users will be redirected after they have verified their email address. You can choose a predefined page (like the Cart or Checkout) or set up a custom page.
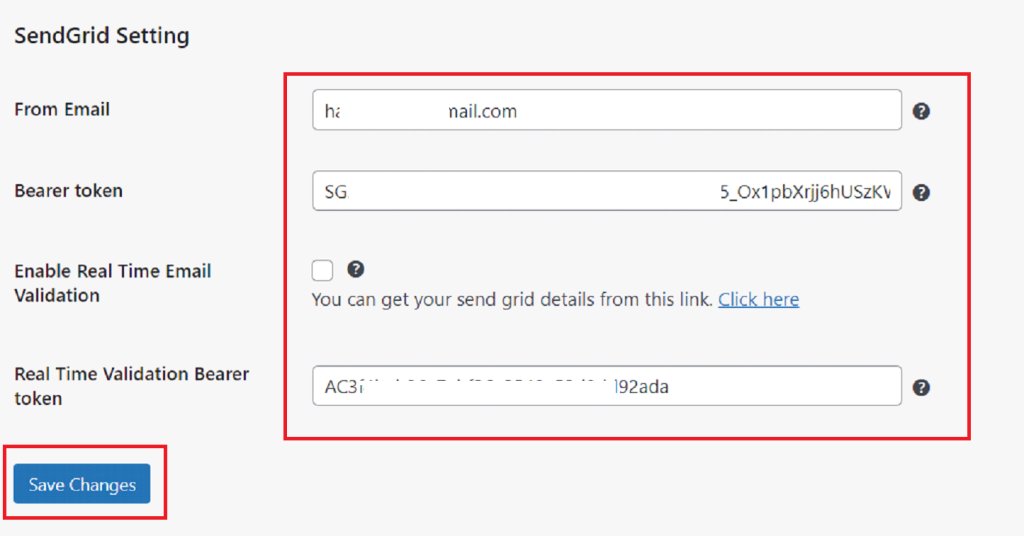
Once you’re done configuring the mail settings, click Save Changes to apply the settings.
That’s it! Now, you’ve successfully enabled email verification for Contact Form 7.
Final Remarks
Adding email verification for Contact Form 7 is a simple yet effective way to ensure your contact form submissions are valid and spam-free. By following the steps outlined in this guide, you can implement this feature in just a few minutes, significantly improving the quality of your incoming emails.
Not only does email verification enhance your site’s security, but it also boosts your email deliverability and helps ensure that your replies reach actual people. Implementing this feature is a win-win for both you and your site visitors.If you need any help, feel free to contact our support team.


