Do you want to create a custom email template in WooCommerce? If so, today, you are in luck! We will show you how to do it the right way!
Default WooCommerce order emails can leave a poor impression of your brand, potentially lead to buyer remorse, and result in missed opportunities for further customer engagement.
With an open rate of 80-85%, compared to the 20-25% average for marketing emails, transactional or order emails offer a significant opportunity for brands to engage with their customers. These emails provide prime real estate for showcasing your brand identity and creating a post-sales experience that customers enjoy.
So, are you ready?
Let’s check out how to create a custom email template in WooCommerce using the Email Customizer for WooCommerce plugin.
Email Customizer for WooCommerce Plugin
The Email Customizer for WooCommerce plugin allows you to design and customize your WooCommerce transactional emails effortlessly. With a simple drag-and-drop email builder, you can create professional, branded emails that stand out. No coding skills are required, and the plugin comes with 12 pre-made templates, making customization quick and easy.
Whether you want to tweak layouts, colors, or content blocks, this plugin provides unlimited design possibilities. It’s the perfect solution for businesses looking to enhance their email communication with customers.
Key Features:
- Drag-and-drop email builder
- 12 ready-to-use templates
- Customizable WooCommerce transactional emails
- A multitude of design and content blocks
- Mobile-responsive email designs
- Ability to send test emails
- Live preview of changes
- Regular updates for compatibility
- Dynamic WooCommerce blocks for personalized emails
Step-by-Step Guide to Creating a Custom Email Template in WooCommerce
To create custom email templates in WooCommerce, follow the steps below.
Step #1: Install and Activate the Email Customizer for WooCommerce
The first step in creating a custom email template is to install and activate the Email Customizer for WooCommerce plugin. Here’s how to do it:
- First, buy the Email Customizer for WooCommerce plugin from CodeCanyon.
- Next, log in to your WordPress dashboard.
- Navigate to the Plugins menu on the left-hand side and click on Add New Plugin.
- Now, click on Upload Pugin and select the .zip file you received in your mailbox.
- Click Install Now and then Activate it by entering the Licence Key.
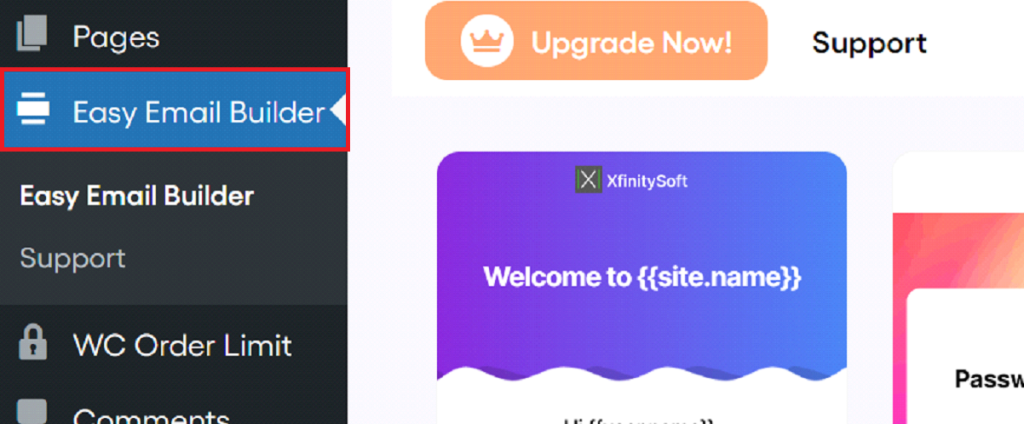
Activating the plugin will add a new menu item called “Easy Email Builder” to your WordPress dashboard, where you can start creating your gift vouchers.
Step #2: Choose the WooCommerce Email Template You Want to Edit
Upon clicking on the “Easy Email build” option, you will see all the different templates of transactional emails that are automatically sent during the order process in WooCommerce.
You can choose to edit any one of these templates by hovering over the template and clicking the pencil icon.
In WooCommerce, you can customize various order-related emails that are sent out to customers throughout the purchasing process. Here are the most common order emails you can customize:
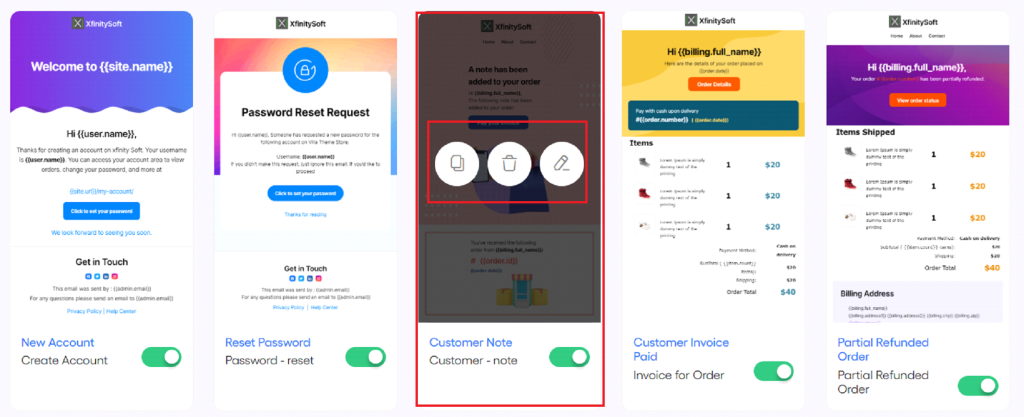
- New Account
- Reset Password
- Customer Note
- Customer Invoice Paid
- Partial Refunded Order
- Fully Refunded Order
- Completed Order
- Processing Order
- Order On-Hold
- Failed Order
- Canceled Order
- New Order
Each of these emails serves a specific purpose in the customer journey, from the moment an order is placed to when it is fulfilled. Customizing WooCommerce emails allows you to provide a consistent brand experience, offer relevant information, and, most importantly, promote other products or services, opening up new avenues for business growth.
Step #3: Design Your Email Layout
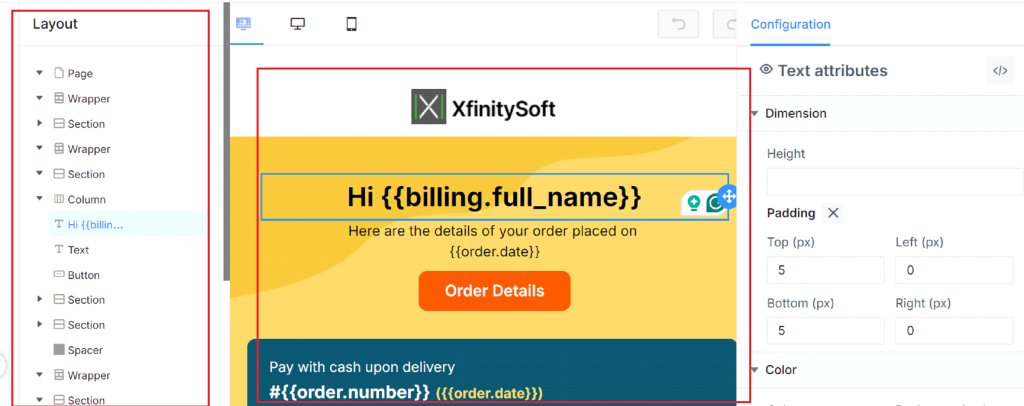
Use the layout blocks provided by Easy Mail Customizer to create the structure of your email.
These include:
- Wrapper: The overall container for your email.
- Section: Acts as a row to hold columns or groups.
- Columns: To add different content parallel to each other on top.
- Groups: These are similar to columns but do not stack on mobile devices.
Step #4: Add Content to Your Custom WooCommerce Email Templates
Now, populate your layout with content blocks by dragging and dropping elements such as text, images, and buttons into the layout sections.
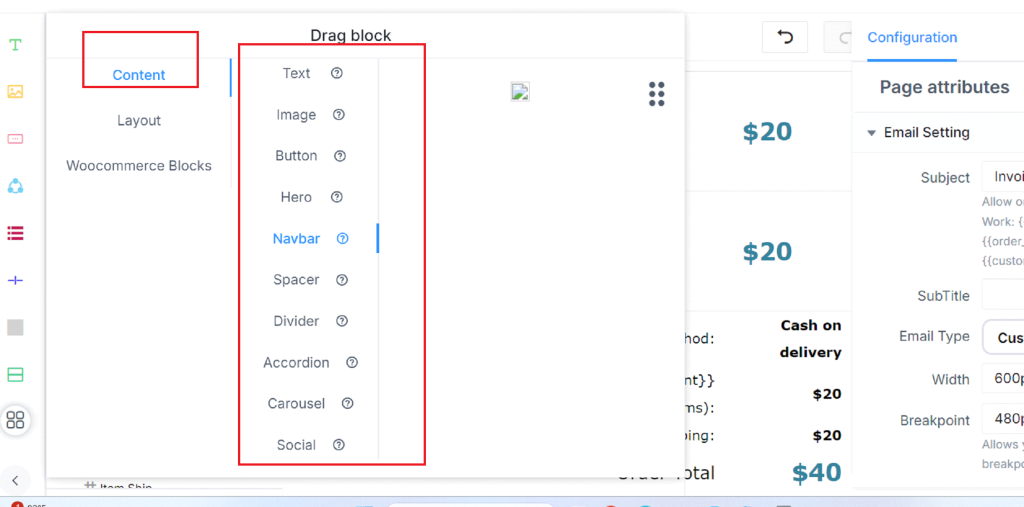
Here are the content blocks that are available to use:
- Text: Add textual content to your emails.
- Image: Insert responsive images.
- Buttons: Include clickable buttons.
- Navbar: Add a navigation menu with a compact hamburger option for mobile.
- Spacer: Create space in your email with varying widths.
- Divider: Insert a horizontal line with styles like solid, dashed, or dotted.
- Accordion: Use tabs to organize content compactly, expanding to show details on click.
- Carousel: Showcase a rotating image gallery.
- Social: Feature social network icons for quick actions.
- Hero Image: Place a large, banner-style image with overlaid text and buttons.
Step #5: Add WooCommerce Blocks
Drag and drop WooCommerce blocks into your email to add dynamic content like product recommendations, order details, and more.

Here are the WooCommerce blocks available for use when you customize WooCommerce emails:
- Recommended Products: This block showcases additional items for purchase, encouraging further sales.
- Billing Address: Dynamically populates and displays the customer’s billing details.
- Shipping Address: Dynamically populates and displays the customer’s shipping details.
- Order Detail: Provides a comprehensive view of the customer’s order contents.
- Order Total: Displays the complete payment amount for the customer’s order.
- Order Subtotal: This shows the amount for the items purchased before taxes and shipping.
Step #6: Further Customize with Advanced Settings
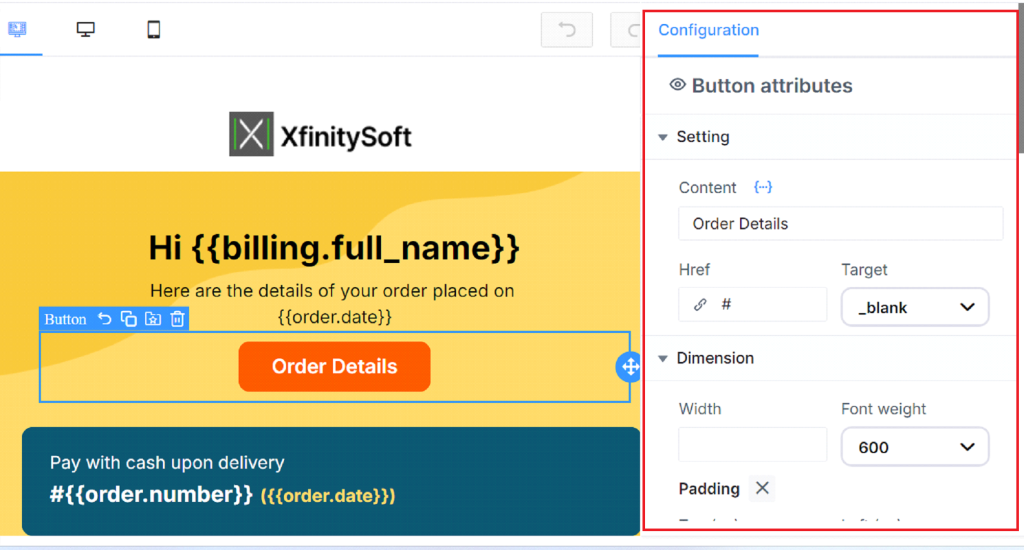
Click on any element to open the advanced settings panel on the right side.
Adjust settings like email subject, width, fonts, and colors to match your brand’s style.
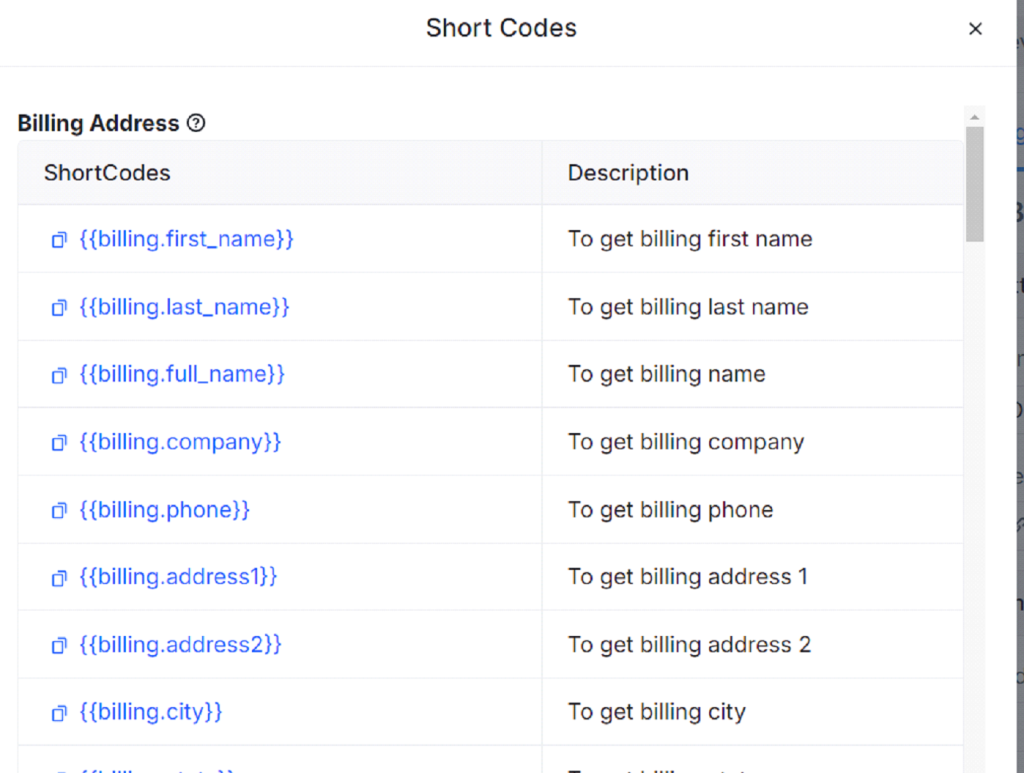
Step #7: Use Shortcodes for More Personalization
Click on the “Short Codes” button at the top to insert shortcodes into your email and personalize content with customer-specific information like name, order number, address, etc.
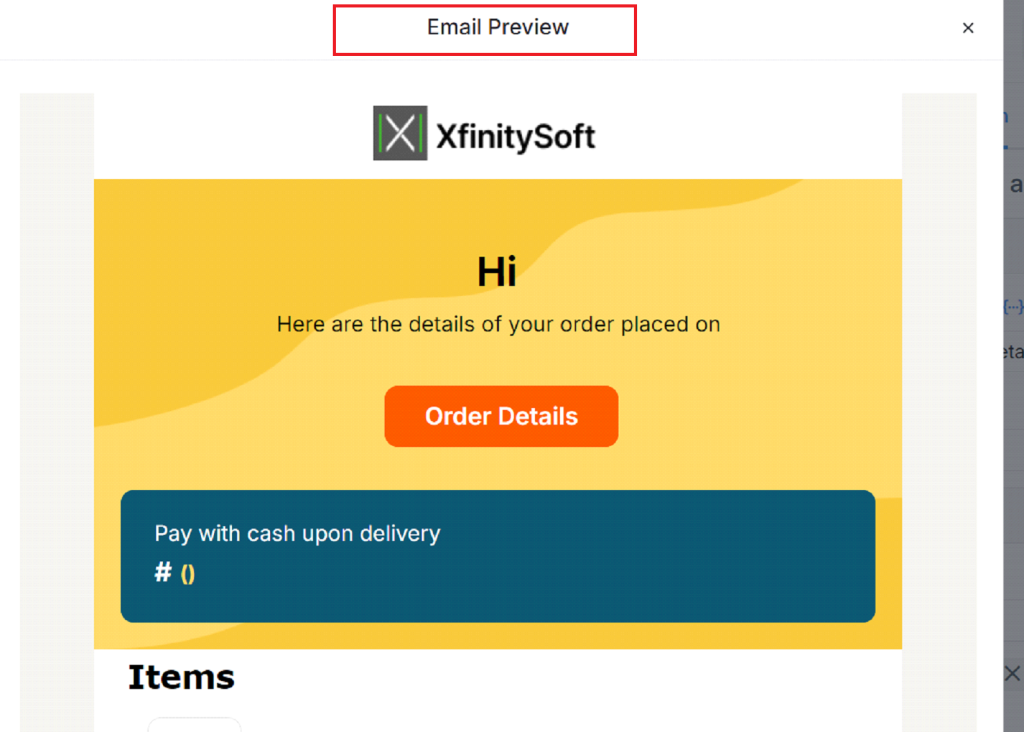
Step #8: Preview Your Email
Use the ‘Email Preview’ feature to see how your email will look on desktop and mobile devices.
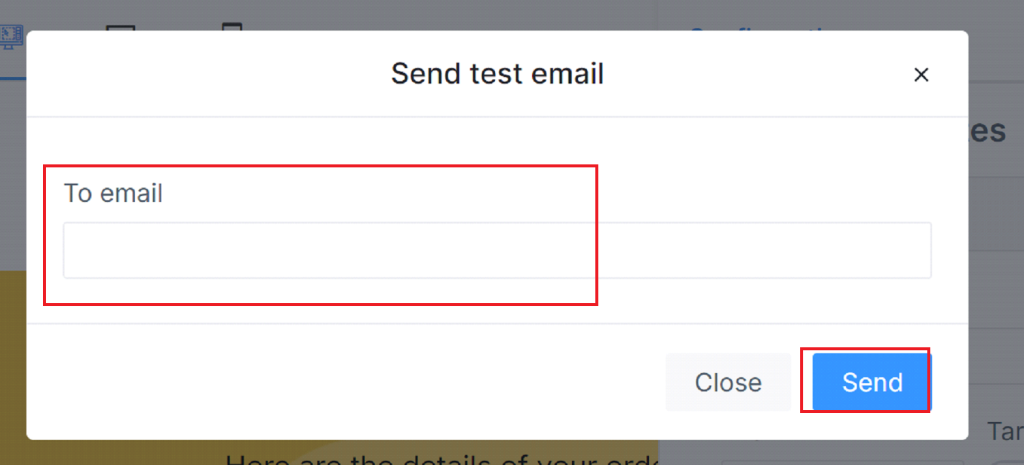
Step #9: Send Test Emails
Before applying the changes, send test emails to a valid email address that you have access to so you can make sure everything appears as expected.
Step 10: Finally, Save to Apply the Customization
Once satisfied with the customization, save your changes. Your new, personalized WooCommerce order emails are now ready to enhance your customer’s post-purchase experience.

That’s it. The Email Customizer for WooCommerce plugin offers a ton of options for customizing WooCommerce emails. The easy-to-use interface allows anyone to make edits without any custom coding.
So, what’s holding you back? Get the Email Customizer for WooCommerce plugin today and take your WooCommerce email template customization to the next level.

